Using NGINX Basic Auth for WordPress Headless CMS
February 27th 2020
As the saying goes, “old habits die hard.” And so do traditional CMS systems. Sometimes change takes a momentous effort. We are comfortable with what we know, even if something “better” is presented to us. It’s human nature to be fearful of the unknown.
“If I had asked people what they wanted, they would have said faster horses.”
– Henry Ford
So what if you are in love with the idea of JAMStack like we are but you can’t get your clients to change? With any relationship there are going to be moments and decisions of compromise. What if you could let them keep their traditional CMS (such as WordPress) and use the backend as a data source, decoupling the front-end layer and still using JAMStack methods to publish the front-end? This allows you to use the JAMStack workflow while allowing clients to retain access to the admin dashboard they’ve come to enjoy. Today we’ll take a look at how you can harden your WordPress backend through NGINX authentication techniques, while exposing the WP JSON endpoint and using the endpoint to aggregate content into you static site generator.
Most of the magic here is done in the NGINX configuration file, and for this tutorial we’re assuming that you are using NGIX as the web server. You are using NGINX correct? If not, you can consult the docs for Apache or other web services to setup basic authentication. First things first is setting up your .htpasswd file which will be referenced in our virtual host site configuration. In order to create a .htpasswd file you may need a linux package utility. For Ubuntu you can use: c and for RedHat/CentOs you can use httpd-tools to create the .htpasswd file
sudo apt-get install -y apache2-utilsYou can confirm by running: which htpasswd to make sure it’s installed. htpasswd is the command we’ll use to generate our .htpasswd file. You can choose to create this file in any location as long as you remember the path to the file for our vhost configuration. In this example we’ll create it under /etc/nginx directory.
sudo htpasswd -c /etc/apache2/.htpasswd usernameMake sure you replace username with the username you want to use for Basic Auth. You will be prompt for a password as well. Type the password and make sure you write down your username/password as you will need it to access your WordPress CMS after configuring the Basic Auth. You should now have a file in /etc/nginx/.htpasswd that will look something like:
username:$amr1$JNspFNLu$QBQ0A1gcbPTdycWeY7Ej78Which is a representation of your user and hashed password. Now onto the virtual host config for your website. Inside the vhost found in /etc/nginx/sites-avaiable/example.com you should have a basic configuration for your WordPress website already setup. It should look something like:
# Upstream to abstract backend connection(s) for php
upstream php {
        server unix:/run/php/php7.0-fpm.sock;;
        server 127.0.0.1:9000;
}

server {
        ## Your website name goes here.
        server_name example.com;
        ## Your only path reference.
        root /var/www/wordpress;
        ## This should be in your http block and if it is, it's not needed here.
        index index.php;

        location = /favicon.ico {
                log_not_found off;
                access_log off;
        }

        location = /robots.txt {
                allow all;
                log_not_found off;
                access_log off;
        }

        location / {
                # This is cool because no php is touched for static content.
                # include the "?$args" part so non-default permalinks doesn't break when using query string
                try_files $uri $uri/ /index.php?$args;
        }

        location ~ \.php$ {
                #NOTE: You should have "cgi.fix_pathinfo = 0;" in php.ini
                include fastcgi-php.conf;
                fastcgi_intercept_errors on;
                fastcgi_pass php;
        }

        location ~* \.(js|css|png|jpg|jpeg|gif|ico)$ {
                expires max;
                log_not_found off;
        }
}
First things first is we’re going to allow auth_basic for all locations by placing the auth_basic definition in our server block:
server {
        ## Your website name goes here.
        server_name example.com;
        ## Your only path reference.
        root /var/www/wordpress;
        index index.php;

        ## Turn on Basic Auth ##
        auth_basic      "Protected";
        auth_basic_user_file /etc/nginx/.htpasswd;
  ...
}
This will turn on basic auth for all routes. Now if you try to login to your WordPress site you should see an NGINX Basic Auth login screen:
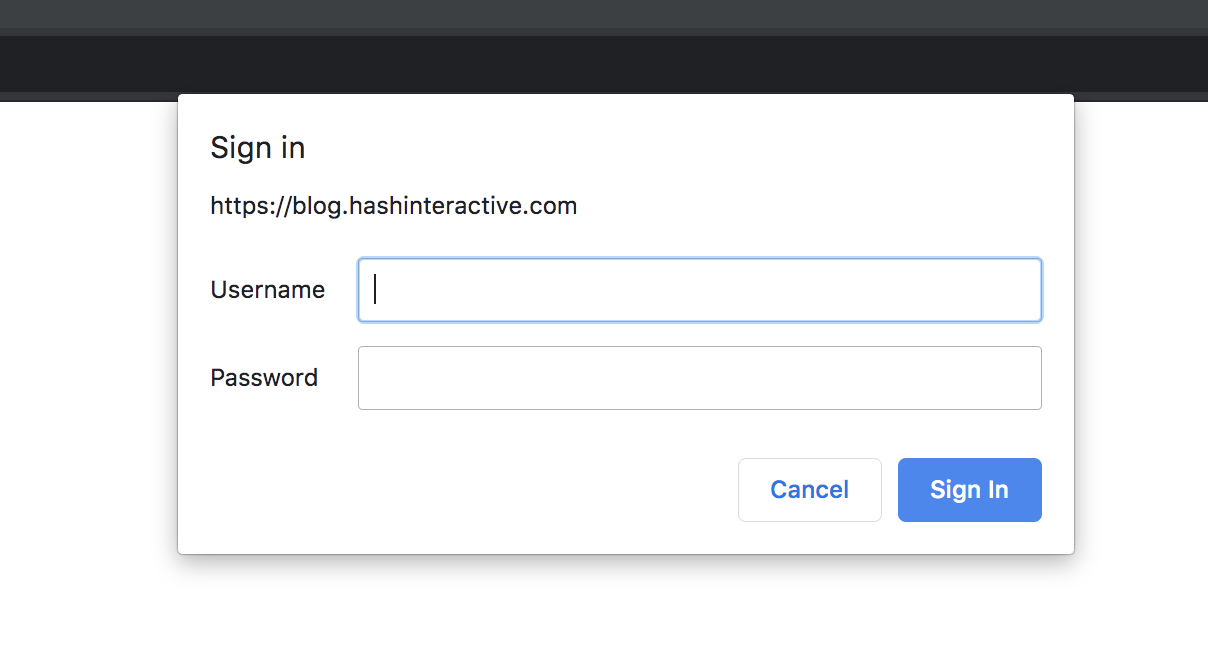
We have our whole CMS authenticated behind NGINX Basic Auth, but there are a few more tweaks to our vhost configuration to allow for Basic Auth to work. The first edit we need to make is to allow for cross-origin “preflight” OPTIONS xhr request that our front-end or application client is going to make before it sends the actual GET/POST ajax request. The OPTIONS preflight call will send client headers and expects the server to respond with the correct Access-Control-Allow- headers to verify cross-origin AJAX requests. We can put the OPTIONS definition in our main location / block such as:
server {
  ...
       location / {
         if ($request_method = 'OPTIONS') {
          add_header 'Access-Control-Allow-Origin' "$http_origin" always;
          #
          # cookies
          #
          add_header 'Access-Control-Allow-Credentials' 'true';
          add_header 'Access-Control-Allow-Methods' 'GET, OPTIONS';
          #
          # Custom headers and headers various browsers *should* be OK with but aren't
          #
          add_header 'Access-Control-Allow-Headers' 'Origin, X-Requested-With, Content-Type, Accept, Authorization';
          #
          # Tell client that this pre-flight info is valid for 20 days
          #
          add_header 'Access-Control-Max-Age' 1728000;
          add_header 'Content-Type' 'text/plain charset=UTF-8';
          add_header 'Content-Length' 0;
          return 204;
        }
        try_files $uri $uri/ /index.php?$args;
      }
  ...
}
With that in place our AJAX preflight OPTIONS request will succeed and our client will proceed to send the GET request for the wp-json endpoint. Because we are using Basic Auth the header Access-Control-Allow-Origin can not be set to Access-Control-Allow-Origin: '*' as we are going to be making our AJAX request withCredentials and thus our preflight OPTIONS request returns a header: Access-Control-Allow-Credentials: true
The
developer.mozilla.orgAccess-Control-Allow-Credentialsheader works in conjunction with theXMLHttpRequest.withCredentialsproperty or with thecredentialsoption in theRequest()constructor of the Fetch API. For a CORS request with credentials, in order for browsers to expose the response to frontend JavaScript code, both the server (using theAccess-Control-Allow-Credentialsheader) and the client (by setting the credentials mode for the XHR, Fetch, or Ajax request) must indicate that they’re opting in to including credentials.
If you are sending Access-Control-Allow-Origin: '*' alongside Access-Control-Allow-Credentials you will see the following error in your client side code: Credential is not supported if the CORS header ‘Access-Control-Allow-Origin’ is ‘*’. As stated in the docs:
The CORS request was attempted with the credentials flag set, but the server is configured using the wildcard (
developer.mozilla.org"*") as the value ofAccess-Control-Allow-Origin, which doesn’t allow the use of credentials. If, instead, you need to adjust the server’s behavior, you’ll need to change the value ofAccess-Control-Allow-Originto grant access to the origin from which the client is loaded.
So how would we allow the WordPress JSON API to set the correct headers for Access-Control-Allow-Origin when we potentially need to be able to dynamically set this header value based on where the client is sending the request from? IE. in development mode the header needs to be something like: Access-Control-Allow-Origin: 'localhost:3000' but in production you need this to be the domain that your front-end/client side is sending from such as: Access-Control-Allow-Origin: 'mydomain.com'. Fortunately, we have access to the WordPress action: 'rest_api_init' which we can hook into and use the WordPress filter: 'rest_pre_serve_request'. Our action and filter can be placed in our themes function.php file and would looks similar to:
add_action( 'rest_api_init', function () {
  remove_filter( 'rest_pre_serve_request', 'rest_send_cors_headers' );
  add_filter( 'rest_pre_serve_request', function( $value ) {
          if (array_key_exists('HTTP_ORIGIN', $_SERVER)) {
              $origin = $_SERVER['HTTP_ORIGIN'];
          }
          else if (array_key_exists('HTTP_REFERER', $_SERVER)) {
              $origin = $_SERVER['HTTP_REFERER'];
          } else {
              $origin = $_SERVER['REMOTE_ADDR'];
          }
          header( 'Access-Control-Allow-Origin: ' . esc_url_raw( $origin ) );
          header( 'Access-Control-Allow-Methods: GET' );
          header( 'Access-Control-Allow-Credentials: true' );
          header( 'Access-Control-Expose-Headers: Link', false );

          return $value;
  } );
}, 99);
We are first removing the filter function 'rest_send_cors_headers' and replacing that with our own anonymous function that does some “origin” checking to make sure that the variable $origin always exists whether that is sent with an HTTP_ORIGIN header as would be the case in an AJAX request or in that is not present than the fallback is $_SERVER['HTTP_REFERER'] and/or $_SERVER['REMOTE_ADDR']; which would be set if the request was coming from another server or a utility such as curl. Then we are setting these headers for the response headers:
header( 'Access-Control-Allow-Origin: ' . esc_url_raw( $origin ) );
header( 'Access-Control-Allow-Methods: GET' );
header( 'Access-Control-Allow-Credentials: true' );
header( 'Access-Control-Expose-Headers: Link', false );
You can change these depending on your cross-origin needs such as 'Access-Control-Allow-Methods: GET' to allow for other methods such as POST requests but since we’re just reading from our wp-json endpoint we only need to set the GET method for Access-Control-Allow-Methods. There is a great article that defines from different options you can use in your rest_pre_serve_request filter that I would recommend checking out for further reading.
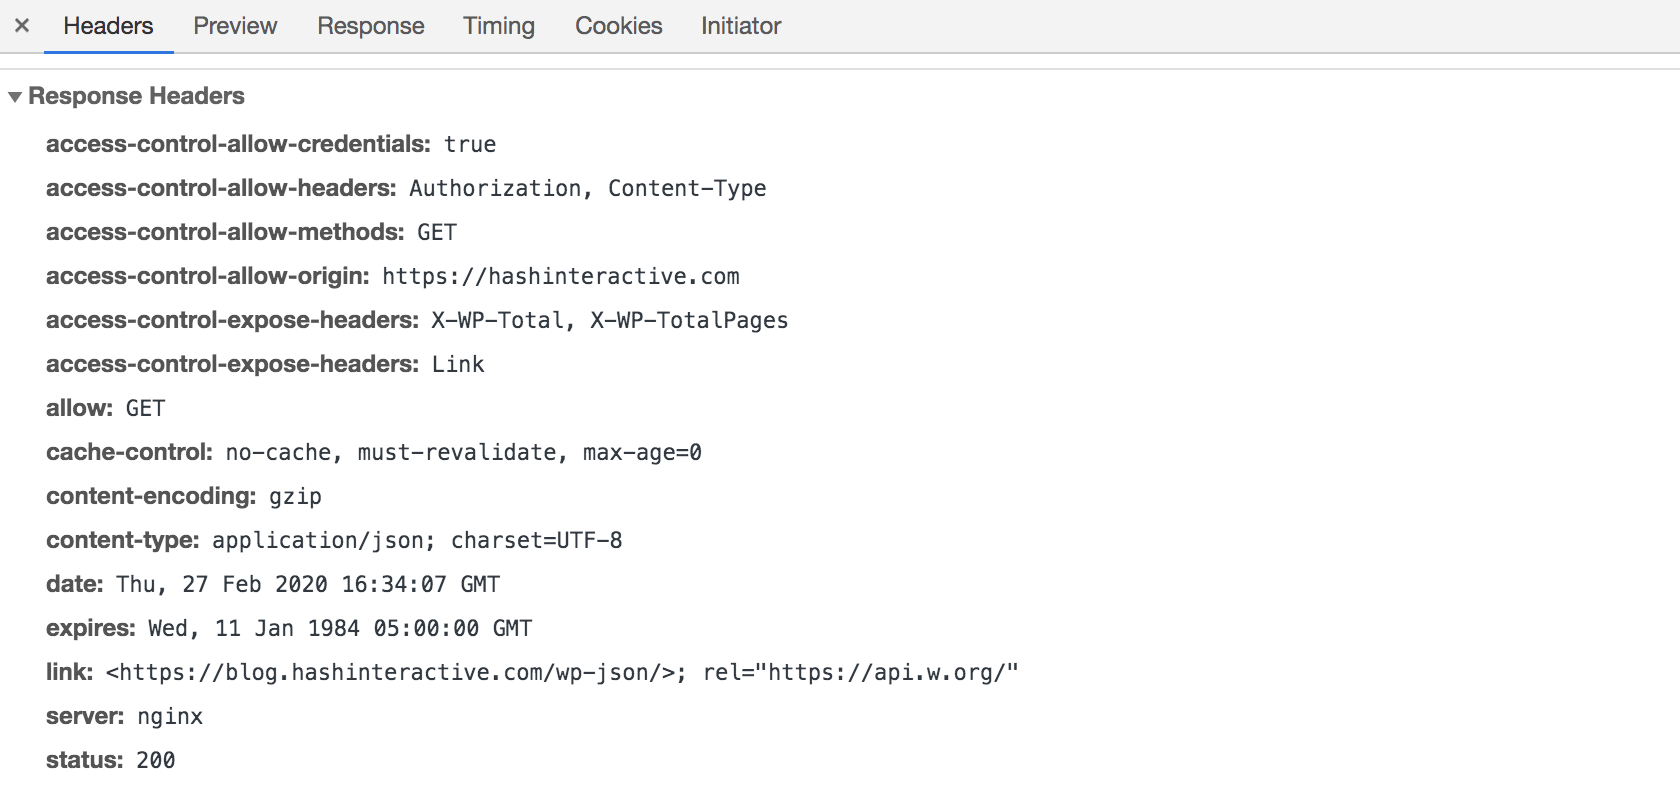
Now that we have set our headers using the WordPress action add_action( 'rest_api_init', function() { ... }) using the filter add_filter( 'rest_pre_serve_request', function( $value ) { ... }) we should be sending back the correct headers for our AJAX cross-origin request. And you can verify in Chrome or Firefox developer tools by looking at the Network tab:
Also, we probably don’t want Basic Auth turned on in NGINX when we request images from our WordPress site so we’re going to add auth_basic off in our images location directive of our virtual hosts file:
server {
  ...
       location ~* \.(js|css|png|jpg|jpeg|gif|ico)$ {
                auth_basic off;
                expires max;
                log_not_found off;
        }
  ...
}
Our final NGINX config file should look like:
# Upstream to abstract backend connection(s) for php
upstream php {
        server unix:/run/php/php7.0-fpm.sock;;
        server 127.0.0.1:9000;
}

server {
        ## Your website name goes here.
        server_name example.com;
        ## Your only path reference.
        root /var/www/wordpress;
        ## This should be in your http block and if it is, it's not needed here.
        index index.php;

        ## Turn on Basic Auth
        auth_basic      "Protected";
        auth_basic_user_file /etc/nginx/.htpasswd;

        location = /favicon.ico {
                log_not_found off;
                access_log off;
        }

        location = /robots.txt {
                allow all;
                log_not_found off;
                access_log off;
        }

       location / {
         if ($request_method = 'OPTIONS') {
          add_header 'Access-Control-Allow-Origin' "$http_origin" always;
          #
          # cookies
          #
          add_header 'Access-Control-Allow-Credentials' 'true';
          add_header 'Access-Control-Allow-Methods' 'GET, OPTIONS';
          #
          # Custom headers and headers various browsers *should* be OK with but aren't
          #
          add_header 'Access-Control-Allow-Headers' 'Origin, X-Requested-With, Content-Type, Accept, Authorization';
          #
          # Tell client that this pre-flight info is valid for 20 days
          #
          add_header 'Access-Control-Max-Age' 1728000;
          add_header 'Content-Type' 'text/plain charset=UTF-8';
          add_header 'Content-Length' 0;
          return 204;
        }
        try_files $uri $uri/ /index.php?$args;
      }

      location ~ \.php$ {
         include fastcgi-php.conf;
         fastcgi_intercept_errors on;
         fastcgi_pass php;
      }

      location ~* \.(js|css|png|jpg|jpeg|gif|ico)$ {
         auth_basic off;
         expires max;
         log_not_found off;
      }
}
Finally, we need to take a look at how we are sending our AJAX request and need to make sure that we’re sending the withCredentials header and passing in our Basic Authentication credentials. We are choosing to use the axios library which is a promise based HTTP client for the browser and node.js to make our AJAX GET request to our WP JSON endpoint which has a nice option for Basic Auth that will base64 encode our password for us and set the correct authentication headers for Basic Auth. Our axios call would then look like:
const {data} = await axios.get(`https://mywordpress.com/wp-json/wp/v2/posts?per_page=100`, {
      withCredentials: true,
      auth: {
        username: 'username',
        password: 'S0m3P@$$W0rd!'
      }
 })
And we have taken one more step to protect our WordPress backend through NGINX Basic Auth while still allowing us to use the WordPress REST API to GET our posts/pages through /wp-json/wp/v2 endpoint. Until next time, stay curious, stay creative!