Headless WordPress JWT Vue Authentication
May 10th 2020
Using WordPress as a Headless CMS is becoming more and more popular. The web is quickly changing from monolithic content management systems that depend on heavy server logic, to light weight, fast and secure web applications built on front end frameworks like Vue, React and Angular. Many web applications are now depending on APIs and micro services and the client web app is being decoupled from thee backend data source. WordPress was not originally designed to be a headless solution, but with the robust REST API we can creatively use the CMS as a data source. The benefit of using WordPress in a Headless model is that you still get the familiar backend for your content editing, without as many security concerns that come with the monolithic model.
Vue is one of the fastest growing front end JavaScript frameworks that allow developers to build and scale applications that feature dynamic user interfaces. Vue is a great option for creating a front end application with functioning UI. It’s also a great compliment to a Headless CMS back end. Today we will be walking through how to use a Vue Cli project as a front end application and using a headless WordPress installation as our data source. We’re going to be protecting our REST API through using a JWT authentication method. We will also allow users to register to our WordPress site by adding a plugin that allows users to register through the REST API. Since our users are going to need CRUD capabilities on our WordPress posts we are going to change their user role to author upon registration. When our user’s create posts they will need to be authenticated and provide a JWT token (which we will store for them) in the request. Let’s get started!
WordPress REST API Setup
We are assuming you have a WordPress install setup and you are able to administer plugins. We are going to add two plugins and configure them to customize the behavior. The first plugin we will add is the WP REST User plugin which creates an endpoint to be able to register users from our front-end application. We do this so we don’t need send them to our WordPress installation to register and also we are bypassing the necessity to send an administrator JWT token to our front-end application in order to register a user. We can install the WP REST User plugin via the WordPress admin panel or through your preferred method. Once we have the plugin installed we are going hook into the action wp_rest_user_user_register to change our register user’s default role from subscriber to author. We can create a custom plugin or use our theme’s functions.php file to hook into the action:
add_action('wp_rest_user_user_register', 'user_registered');
function user_registered($user) {
        $user->remove_role( 'subscriber' );
        $user->add_role('author');
}
The action callback accepts an WP_User object of our newly registered user in which we can remove_role subscriber and add_role author. Now once the plugin is installed we are able to send a POST request to the endpoint http://example.com/wp-json/wp/v2/users/register with the required POST body of username, email and password. Upon successful registration we should see a response from our server:
{
    "code": 200,
    "message": "User 'myuser' Registration was Successful"
}
If you are logged in to the backend you can navigate to the WordPress Users page and see the newly registered user with the role author. Now we need the ability for our user to create new posts through our API. To do this we’re going to add and configure the JWT Authentication for WP REST API plugin.
JWT Authentication for WP REST API
The JWT Authentication for WP REST API plugin does a lot of heavy lifting on the backend for us by creating a JWT Token for us that we can store and use on the front-end for ensuing requests to our API. The plugin exposes a new endpoint for us /wp-json/jwt-auth/v1/token which we can send a POST request to with user’s login credentials to obtain a JWT that we can use store for our user. You can install the plugin and once installed we will be adding some configuration options to our wp-config.php file in order for the JWT plugin to sign web tokens. Open up wp-config.php in your WordPress install and add a line that defines the constant for the token’s secret:
define('JWT_AUTH_SECRET_KEY', 'your-top-secret-key');You will want to make sure that you replace your-top-secret-key with a unique, secret key which will be used to sign the JWT tokens. After that we can navigate to our theme’s folder and we will add a filter hook to our functions.php file. We will be hooking into jwt_auth_token_before_dispatch filter so we can add the user’s role to our token response. This will be helpful if we want to do permission checks on certain routes in our front-end application to make sure user’s have the correct roles to access those routes. Open up functions.php file and add:
add_filter('jwt_auth_token_before_dispatch', 'add_user_role_response', 10, 2);
function add_user_role_response($data, $user){
        $data['roles'] = $user->roles;
        return $data;
}
Now we can make a request to the new endpoint that the JWT creates: /wp-json/jwt-auth/v1/token with our user’s username and password and in our response object we will not only receive the JWT Token but also the user’s role:
curl -d 'username=jdoe&password=somepass' https://example.com/wp-json/jwt-auth/v1/tokenAnd our response should look like:
{
    "token": "rdfhgi8KV1QiLCJhbGciOiJIUzI1NiJ9.eyJpc3MiOiJodHRwczpcL1wvand0Lmhhc2hjbGllbnRzLmNvbSIsImlhmcGjNtrlk2345Tg5MDI3Nzc5LCJleHAiOjE1ODk2MzI1NzksImRhdGEiOnsidXNlciI6eyJpZCI6IjEwIn19fQ.ttICQtjHCEhcqzzXliSxEfJKtsM9Ly4A6rmknluQGrFEio",
    "user_email": "[email protected]",
    "user_nicename": "jdoe",
    "user_display_name": "jdoe",
    "roles": [
        "author"
    ]
}
Now with our WordPress backend in place and configured to allow user registration through the WP REST API and the ability to create JWT Tokens with the user role included, we’re able to focus on creating our Vue front-end
Vue Cli Create Project
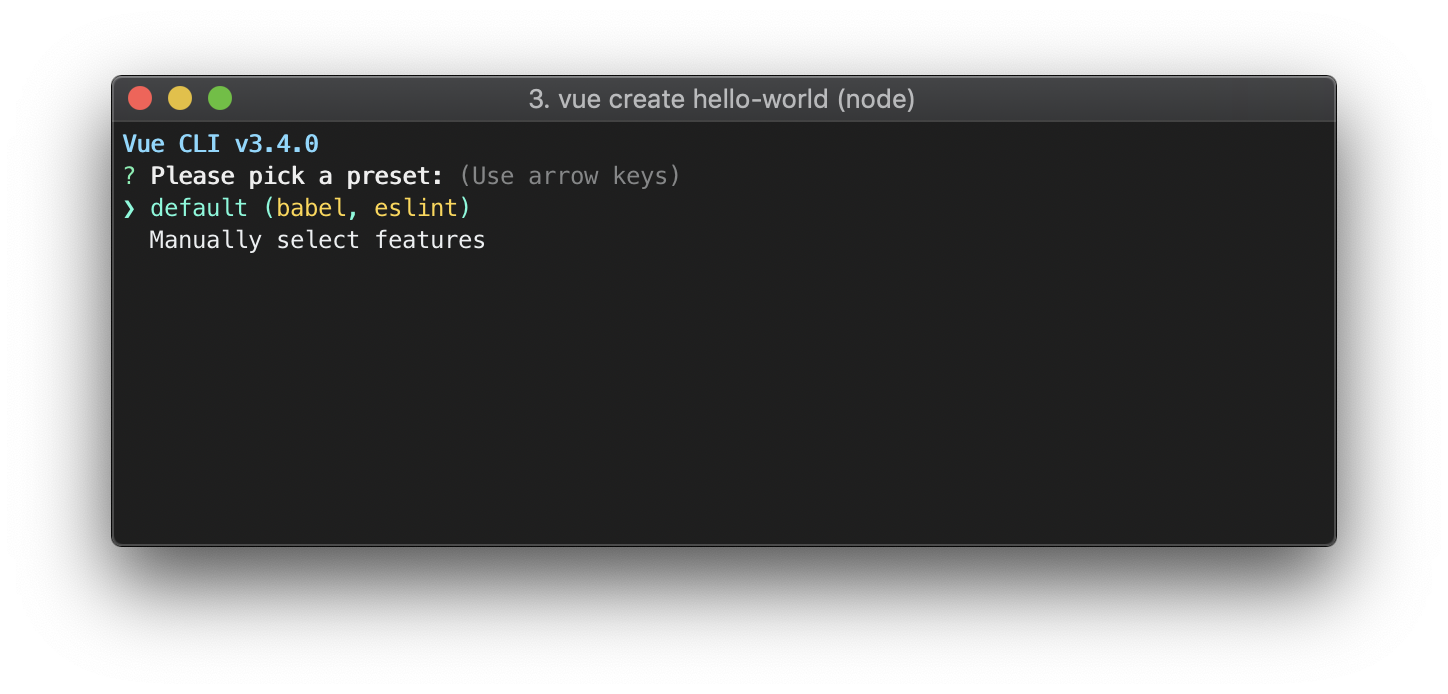
We will be using the @vue/cli to create a new project for our Vue Authentication tutorial. If you don’t have the Vue Cli utility installed you can navigate to https://cli.vuejs.org/ and follow the installation steps. Once installed we will create a new project using the command: vue create vue-wordpress-auth and we will select the “Manually select features” option:
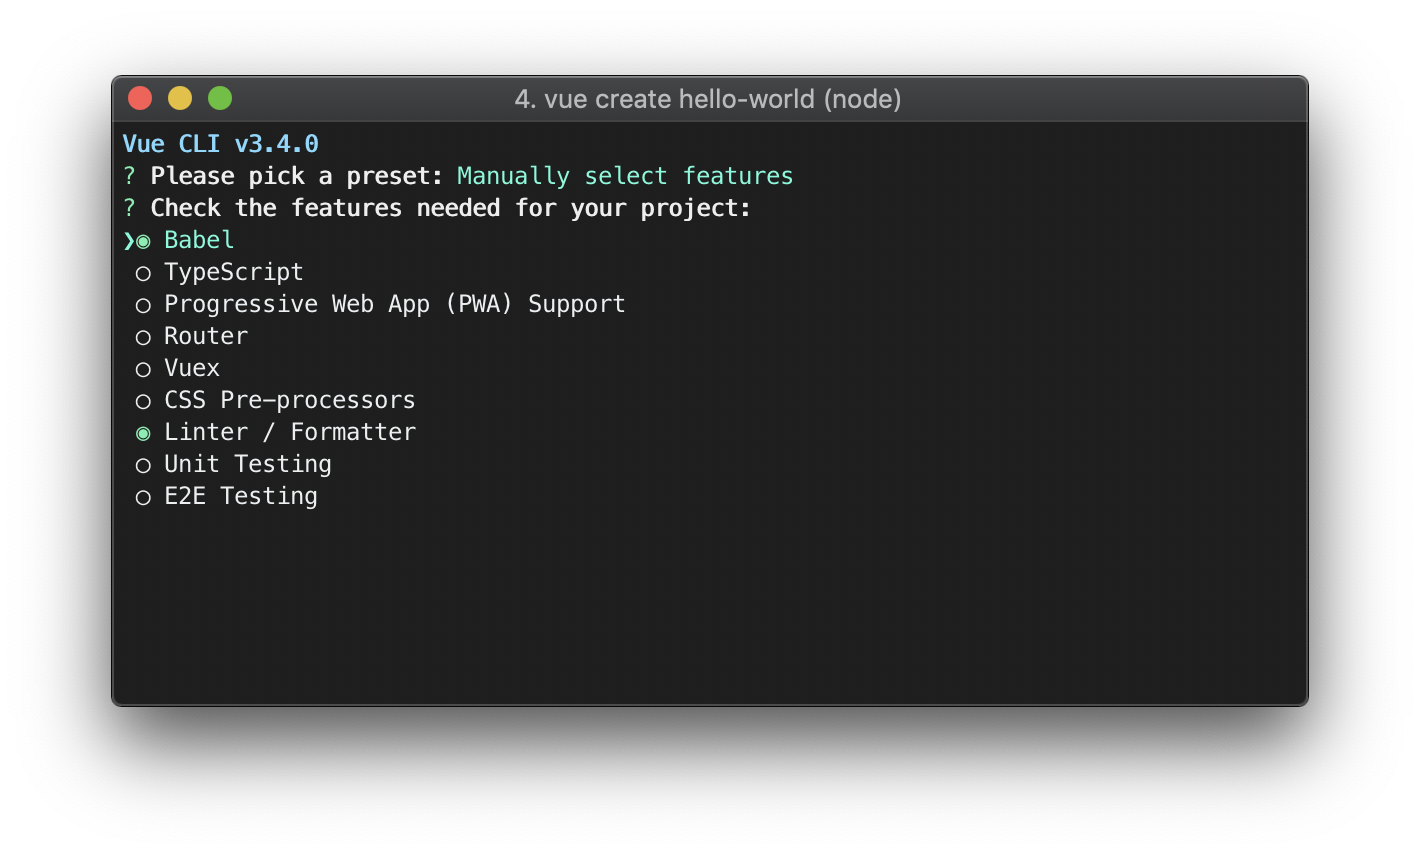
Under the “Manually select features” we will select the options to install “Babel”, “Router” and “Vuex”:
Once the project finishes installing you can change directories into the folder and start the development server by running yarn serve. Now that the project is installed we can start working on the login functionality and sending requests to the WordPress REST API.
Vue Login Page
We can start by creating a login page that will contain our login form and handle the form submission to our API. In the views directory we can create a file called Login.vue and inside the file we can add:
<template>
  <div class="login">
    <div class="container mx-auto px-4">
      <div class="flex -mx-4">
        <div class="w-full">
          <h1>Use this page to login</h1>
        </div>
      </div>
      <div class="flex -mx-4">
        <div class="w-full">
          <LoginForm />
        </div>
      </div>
    </div>
  </div>
</template>

<script>
import LoginForm from '@/components/LoginForm'
export default {
  components: {
    LoginForm
  }
}
</script>
As you. can see in the Login.vue single file component we’re importing the LoginForm.vue component and rendering the form. We will need to add this Route Component to our router/index.js file such that:
import Vue from 'vue'
import VueRouter from 'vue-router'
import store from '../store'
import Home from '../views/Home.vue'

Vue.use(VueRouter)

  const routes = [
  {
    path: '/',
    name: 'Home',
    component: Home
  },
  {
    path: '/login',
    name: 'Login',
    component: () => import(/* webpackChunkName: "login" */ '../views/Login.vue')
  },
  {
    path: '/about',
    name: 'About',
    // route level code-splitting
    // this generates a separate chunk (about.[hash].js) for this route
    // which is lazy-loaded when the route is visited.
    component: () => import(/* webpackChunkName: "about" */ '../views/About.vue')
  }
]

const router = new VueRouter({
  routes
})

export default router
Finally, we can look at our components/LoginForm.vue to handle the form submission. We can create our file LoginForm.vue and scaffold out the form for logging in:
<template>
<div class="w-full max-w-xs mx-auto">
<form @submit.prevent="login()" class="bg-white shadow-md rounded px-8 pt-6 pb-8 mb-4">
<div class="mb-4">
<label class="block text-gray-700 text-sm font-bold mb-2" for="username">
Username
</label>
<input v-model="form.username" class="shadow appearance-none border rounded w-full py-2 px-3 text-gray-700 leading-tight focus:outline-none focus:shadow-outline" id="username" type="text" placeholder="Username">
</div>
<div class="mb-6">
<label class="block text-gray-700 text-sm font-bold mb-2" for="password">
Password
</label>
<input v-model="form.password" class="shadow appearance-none border rounded w-full py-2 px-3 text-gray-700 mb-3 leading-tight focus:outline-none focus:shadow-outline" id="password" type="password" placeholder="•••••••••••">
</div>
<div class="flex items-center justify-between">
<button class="bg-blue-500 hover:bg-blue-700 text-white font-bold py-2 px-4 rounded focus:outline-none focus:shadow-outline" type="submit">
Sign In
</button>
<a class="inline-block align-baseline font-bold text-sm text-blue-500 hover:text-blue-800" href="#">
Forgot Password?
</a>
</div>
</form>
<p class="text-center text-gray-500 text-xs">
©2020 All rights reserved.
</p>
</div>
</template>
<script>
export default {
data(){
return {
form: {
username: '',
password: ''
}
}
},
methods: {
async login() {
}
}
}
</script>You can see in our component we’re keeping our data information in a form object and we’re preventing the form on submit and calling our login() function. Before we finish defining our login() function we will turn our attention to our Vuex store and define our actions and mutations to handle the login functionality.
Vuex State Management
Let’s explore our store/index.js file. We can start with defining the user property in our state object and defining the mutation to set our user:
import Vue from 'vue'
import Vuex from 'vuex'

Vue.use(Vuex)

export default new Vuex.Store({
  state: {
    user: null
  },
  mutations: {
    SET_USER(state, user) {
      state.user = user
    }
  },
  actions: {},
  modules: {
  }
})
We will be using the axios library to make the request to our WordPress JWT REST endpoint. We will define a vuex action and return a promise that will resolve when we get our response back from the JWT request. Let’s add the axios library:
yarn add axiosWe can import the library to our Vuex store and define our action:
import Vue from 'vue'
import Vuex from 'vuex'
import axios from 'axios'

Vue.use(Vuex)

export default new Vuex.Store({
  state: {
    user: null
  },
  mutations: {
    SET_USER(state, user) {
      state.user = user
    }
  },
  actions: {
    login({ commit }, payload){
      return new Promise(async (resolve, reject) => {
        try {
          const { data } = await axios.post(`https://jwt.example.com/wp-json/jwt-auth/v1/token`, payload)
          commit('SET_USER', data)
          resolve(data)
        }catch(e){
          reject(e)
        }
      })
    }
  },
  modules: {
  }
})
In our action login we’re returning a Promise so we can await for the response from our JWT endpoint and resolve the Promise after we commit our user data to our state. If the axios post fails we will reject our promise. We can now return back to our LoginForm.vue to finish the login method using our new Vuex action to dispatch the login request:
<template>
<div class="w-full max-w-xs mx-auto">
<form @submit.prevent="login()" class="bg-white shadow-md rounded px-8 pt-6 pb-8 mb-4">
<div class="mb-4">
<label class="block text-gray-700 text-sm font-bold mb-2" for="username">
Username
</label>
<input v-model="form.username" class="shadow appearance-none border rounded w-full py-2 px-3 text-gray-700 leading-tight focus:outline-none focus:shadow-outline" id="username" type="text" placeholder="Username">
</div>
<div class="mb-6">
<label class="block text-gray-700 text-sm font-bold mb-2" for="password">
Password
</label>
<input v-model="form.password" class="shadow appearance-none border rounded w-full py-2 px-3 text-gray-700 mb-3 leading-tight focus:outline-none focus:shadow-outline" id="password" type="password" placeholder="•••••••••••">
</div>
<div class="flex items-center justify-between">
<button class="bg-blue-500 hover:bg-blue-700 text-white font-bold py-2 px-4 rounded focus:outline-none focus:shadow-outline" type="submit">
Sign In
</button>
<a class="inline-block align-baseline font-bold text-sm text-blue-500 hover:text-blue-800" href="#">
Forgot Password?
</a>
</div>
</form>
<p class="text-center text-gray-500 text-xs">
©2020 All rights reserved.
</p>
</div>
</template>
<script>
export default {
data(){
return {
form: {
username: '',
password: ''
}
}
},
methods: {
async login() {
try{
const result = await this.$store.dispatch('login', this.form)
const { redirect = false } = this.$route.query
const path = redirect ? decodeURI(redirect) : '/'
this.$router.push({ path })
}catch(e){
console.log("Error:")
console.log(e)
}
}
}
}
</script>First, we’re dispatching our login action in vuex and passing the form data as our payload. Then we are waiting for our action to resolve. Once we get the result from the resolved promise we’re are checking if there are any redirect query string parameters in our route. This would mean that the user was redirected to the login page from trying to go to a protected route and needs to be redirected back to that route upon successful login. We are then checking if the redirect query param was set and if not we’re going to redirect the user to the home page. Finally, we’re using the $router.push method to change routes to the specified path. Now that we have the functionality in place to log our user in we can look at how we will protect our routes in our Vue Router instance.
Vue Router Protected Routes
We’re going to be using the Vue Router beforeEach method to check if our route is protected. First let’s define a protected component and route. Create a file in our views folder that is called Protected.vue and we can keep it simple for now:
<template>
  <div class="protected">
    <h1>This is a protected page page</h1>
    <p>Only logged in users are going to be able to see this page</p>
  </div>
</template>
This is a very simple protected component but we will use it to validate the login functionality. Returning to our router/index.js file we can add the route to our routes array. We will also add a meta property to our route definition so we can test our route in the beforeEach hook which we will define in a little bit:
import Vue from 'vue'
import VueRouter from 'vue-router'
import store from '../store'
import Home from '../views/Home.vue'

Vue.use(VueRouter)

  const routes = [
  {
    path: '/',
    name: 'Home',
    component: Home
  },
  {
    path: '/login',
    name: 'Login',
    component: () => import(/* webpackChunkName: "login" */ '../views/Login.vue')
  },
  {
    path: '/about',
    name: 'About',
    // route level code-splitting
    // this generates a separate chunk (about.[hash].js) for this route
    // which is lazy-loaded when the route is visited.
    component: () => import(/* webpackChunkName: "about" */ '../views/About.vue')
  },
  {
    path: '/protected',
    name: 'Protected',
    component: () => import(/* webpackChunkName: "protected" */ '../views/Protected.vue'),
    meta: {
      requiresAuth: true
    }
]

const router = new VueRouter({
  routes
})

export default router
Now we can define our beforeEach hook for our Vue Router to check if the route requires authentication and if the user is logged in:
import Vue from 'vue'
import VueRouter from 'vue-router'
import store from '../store'
import Home from '../views/Home.vue'

Vue.use(VueRouter)

  const routes = [
  {
    path: '/',
    name: 'Home',
    component: Home
  },
  {
    path: '/login',
    name: 'Login',
    component: () => import(/* webpackChunkName: "login" */ '../views/Login.vue')
  },
  {
    path: '/about',
    name: 'About',
    // route level code-splitting
    // this generates a separate chunk (about.[hash].js) for this route
    // which is lazy-loaded when the route is visited.
    component: () => import(/* webpackChunkName: "about" */ '../views/About.vue')
  },
  {
    path: '/protected',
    name: 'Protected',
    component: () => import(/* webpackChunkName: "protected" */ '../views/Protected.vue'),
    meta: {
      requiresAuth: true
    }
]

const router = new VueRouter({
  routes
})

router.beforeEach(async (to, from, next) => {
  if (to.matched.some(record => record.meta.requiresAuth)) {
    // this route requires auth, check if user is logged in
    // if not, redirect to login page.
    if (!store.state.user) {
      next({
        path: '/login',
        query: { redirect: to.fullPath }
      })
    } else {
      // we have a state.user object but
      // we need to check if the token is still valid
      try{
        const { status } = await store.dispatch('validate')
        // user is logged in with a valid token
        next()
      }catch(e){
        // the token is invalid so we will have the user login again
        // clear the token and user info
        store.commit('DELETE_USER')
        next({
          path: '/login',
          query: { redirect: to.fullPath }
        })
      }
    }
  } else {
    // this is not a protected route
    next()
  }
})

export default router
First, we’re checking if the route requires auth by calling to.matched.some(record => record.meta.requiresAuth to see if the meta property we defined for our route is a protected route. If so, we will first check if there is a user object defined in state. Remember we initialize our state.user will null so if we do not have a user object our application will redirect the user to the /login page. If we do have a user object in state we need to check if the token is still valid. If the token is expired or no longer valid we will clear the user and redirect to the login page again. We need to add another action to our state to check if the user’s token is valid. Let’s define the action validate in our Vuex store and we can also add our DELETE_USER mutation to delete the invalid user information and ensure the user is logged out:
import Vue from 'vue'
import Vuex from 'vuex'
import axios from 'axios'

Vue.use(Vuex)

export default new Vuex.Store({
  state: {
    user: null
  },
  mutations: {
    SET_USER(state, user) {
      state.user = user
    },
    DELETE_USER(state) {
      state.user = null
    }
  },
  actions: {
    login({ commit }, credentials){
      return new Promise(async (resolve, reject) => {
        try {
          const { data }  = await axios.post(`https://jwt.example.com/wp-json/jwt-auth/v1/token`, credentials)
          commit('SET_USER', data)
          resolve(data)
        }catch(e){
          reject(e)
        }
      })
    },
    validate({ state }) {
      return axios({
        url: `https://jwt.example.com/wp-json/jwt-auth/v1/token/validate`,
        method: 'post',
        headers: {
          'Authorization': `Bearer ${state.user.token}`
        }
      })
    }
  },
  modules: {
  }
})
Our validate action returns the promise created from axios request and we set our Authorization header to a Bearer token that is stored in our state. Returning back to our router/index.js route beforeEach hook we are dispatching the validate action and if we get a valid 200 response we are calling the next() function confirming the the user is logged in. If not, we are catching the axios error, calling the DELETE_USER mutation and redirecting the user to the /login page:
...
      // we need to check if the token is still valid
      try{
        const { status } = await store.dispatch('validate')
        // user is logged in with a valid token
        next()
      }catch(e){
        // the token is invalid so we will have the user login again
        // clear the token and user info
        store.commit('DELETE_USER')
        next({
          path: '/login',
          query: { redirect: to.fullPath }
        })
      }
...
Now we can validate that our application is using the JWT Authentication adding another router-link in our App.vue:
<template>
  <div id="app">
    <div id="nav">
      <router-link to="/">Home</router-link> |
      <router-link to="/about">About</router-link> |
      <router-link to="/protected">Protected</router-link>
    </div>
    <router-view/>
  </div>
</template>
Once we add the link we can navigate to our development server http://localhost:8080/ and click on the Protected link. We should be redirected to our /login page and once we login with our username and password we should be redirected back to the /protected route we tried to access. If we open up the Vue Developer Tools and look at our Vuex state we can observe our user object stored in our Vuex state:
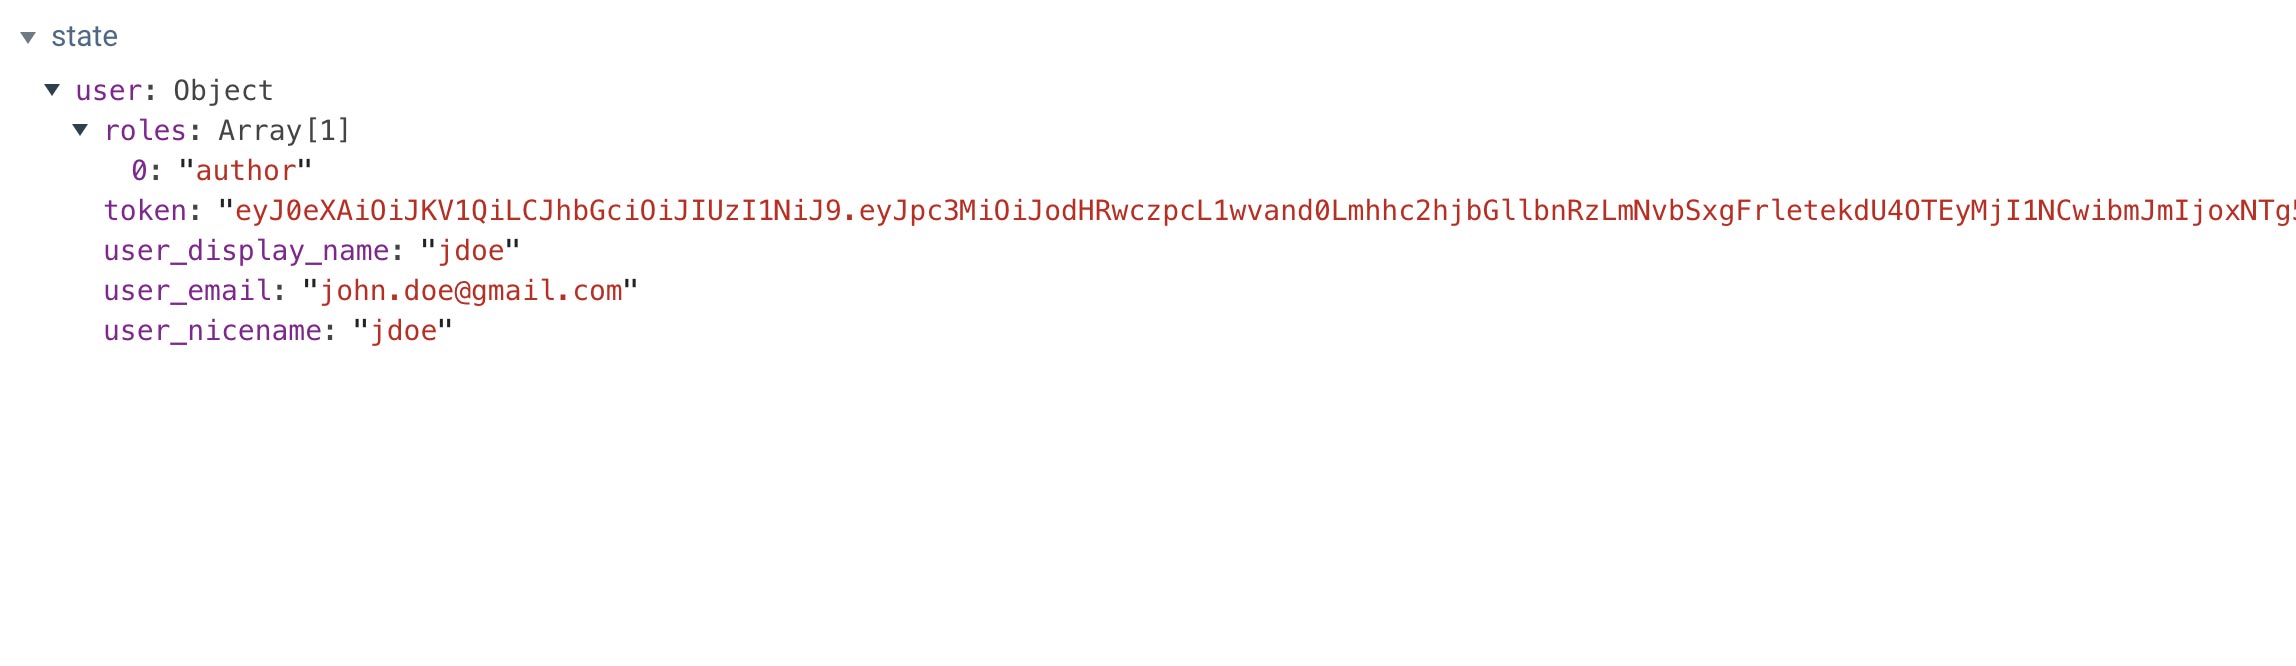
We have successfully used WordPress in Headless instance and used the WordPress JWT Authentication Plugin to authenticate a user and send the JWT token to our front-end Vue application. We could now continue to build out our Vue application to create protected routes and also use the WordPress REST API to create posts sending the JWT token as an Authorization Bearer header in our POST request. The sky is the limit with CRUD capabilities for our application, all the while maintaining our WordPress installation in a Headless model! Until next time, stay curious, stay creative.